Tutorial
This tutorial is written for Microsoft SQL Server
Installing dbmgr
Extract into a directory; recommend C:/dbmgr

Since you will be executing dbmgr from the project path, it is convenient to add the installation path to your system PATH environment variable. From the Control Panel, open up the system dialog:
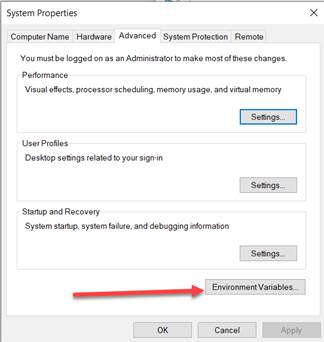
Then add c:/dbmgr to your path and click OK.

Test this works by navigating to your project path, c:/myproject: and execute dbmgr.
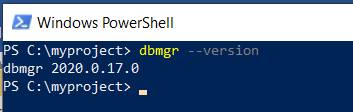
Run
dbmgr --version
Setup the project
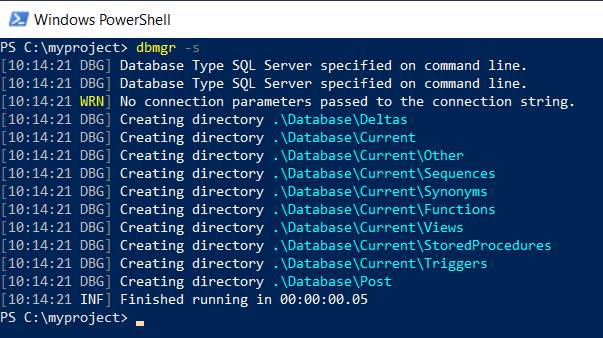
Navigate to your project path, c:/myproject and tell dbmgr to create the directories you will be using for your database scripts:
Run:
dbmgr -s
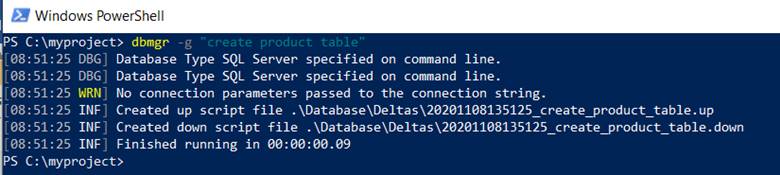
Use dbmgr to create the first delta script that you will use to create a new table in your database.
Run:
dbmgr -g “<description of change>”
Open the up file and you will see this template:
Add the following SQL to add the table:
CREATE TABLE [Product] (
[ProductID]
INTEGER
IDENTITY(
1,1) NOT NULL,
[Name]
VARCHAR(
255) NOT NULL,
CONSTRAINT
[PK_Product]
PRIMARY KEY (
[ProductID]
)
)
GO
EXECUTE
sp_addextendedproperty
N'MS_Description
',
N'The
name of our product.', 'SCHEMA',
N'dbo
', 'TABLE',
N'Product
', 'COLUMN',
N'Name
'
GO
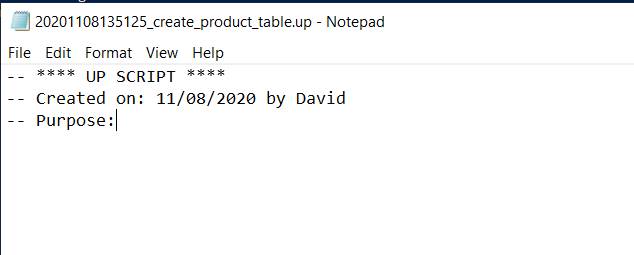
Your up file should now look like this:

You don’t need to use dbmgr to create a code script, such as a view or stored procedure. We’ll now create a text file that follows the naming convention for a view.
Now, add the following SQL to this file to create the view:
IF EXISTS
( SELECT
* FROM
sys.objects
WHERE
object_id
= OBJECT_ID(
N'ReadFirstProduct
'))
DROP VIEW [ReadFirstProduct]
GO
CREATE VIEW
[ReadFirstProduct]
AS
SELECT TOP 1 * FROM Product
GO
Keep in mind, since a current script will run over and over, you will need to ensure the script will overwrite an existing view of the same name.
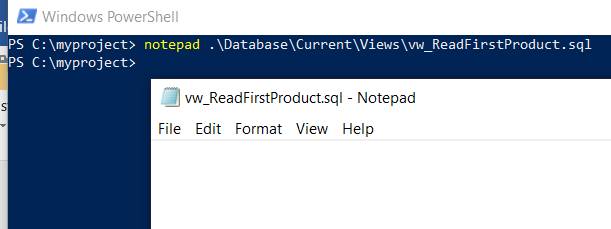
Your file should now look like this:

Now that we have our versioned change scripts ready, let’s apply them to the database.
Connect to the database to run dbmgr
First, we’ll need to connect to a database. There are several ways to do this, but for our example, we’ll use the “standard” properties.
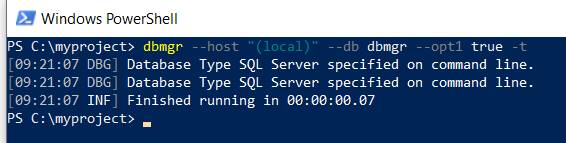
The way to ensure your connection is good is using the -t test capability with -t flag:
Run:
dbmgr --host “<name of server>” --db “<name of database>” --opt1 “<integrated security flag>” -t
A successful connection will return:
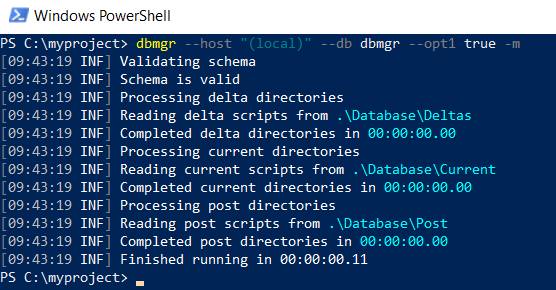
Now, let’s apply the scripts to the database. From the project directory, run the migration command.
Run:
dbmgr --host “<name of server>” --db “<name of database>” --opt1 “<integrated security flag>” -m
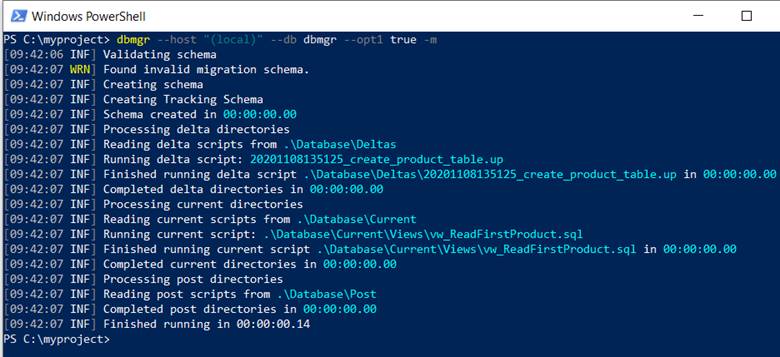
Your database will be created with the scripts you had.

If you run the migration command again, no changes will be applied to the database.
If we want to add a column to our product table, you will generate
another delta script to capture that change to the environment:

Add the following SQL to your up script.
ALTER TABLE [Product] ADD
[Active]
BIT CONSTRAINT
[DEF_Product_Active]
DEFAULT 1 NOT NULL
GO
Now, we’ll want to change our view as well. To do this, simply change the file which holds the view. dbmgr will detect this and ensure the correct view is deployed during the next deployment.
Change your SQL script to add a WHERE Active = 1 to the predicate of the view’s statement.
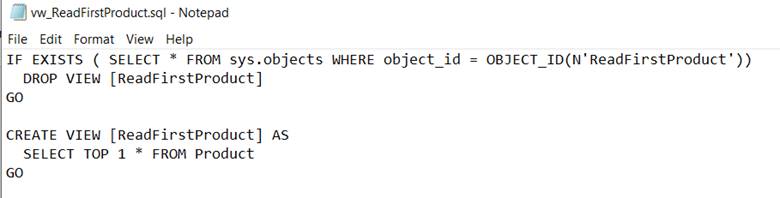
It should now look like this:
IF EXISTS
( SELECT
* FROM
sys.objects
WHERE
object_id
= OBJECT_ID(
N'ReadFirstProduct
'))
DROP VIEW [ReadFirstProduct]
GO
CREATE VIEW
[ReadFirstProduct]
AS
SELECT TOP 1 * FROM Product WHERE Active = 1
GO
At this point, we are ready to apply the new changes to the database by applying the migration command once again.
As before, run:
dbmgr --host “<name of server>” --db “<name of database>” --opt1 “<integrated security flag>” -m
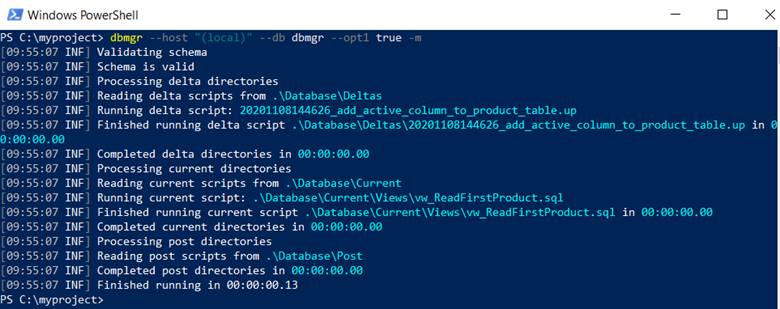
Your database is now up to date!
This concludes this tutorial. For more information, read the Full Documentation.